The main window
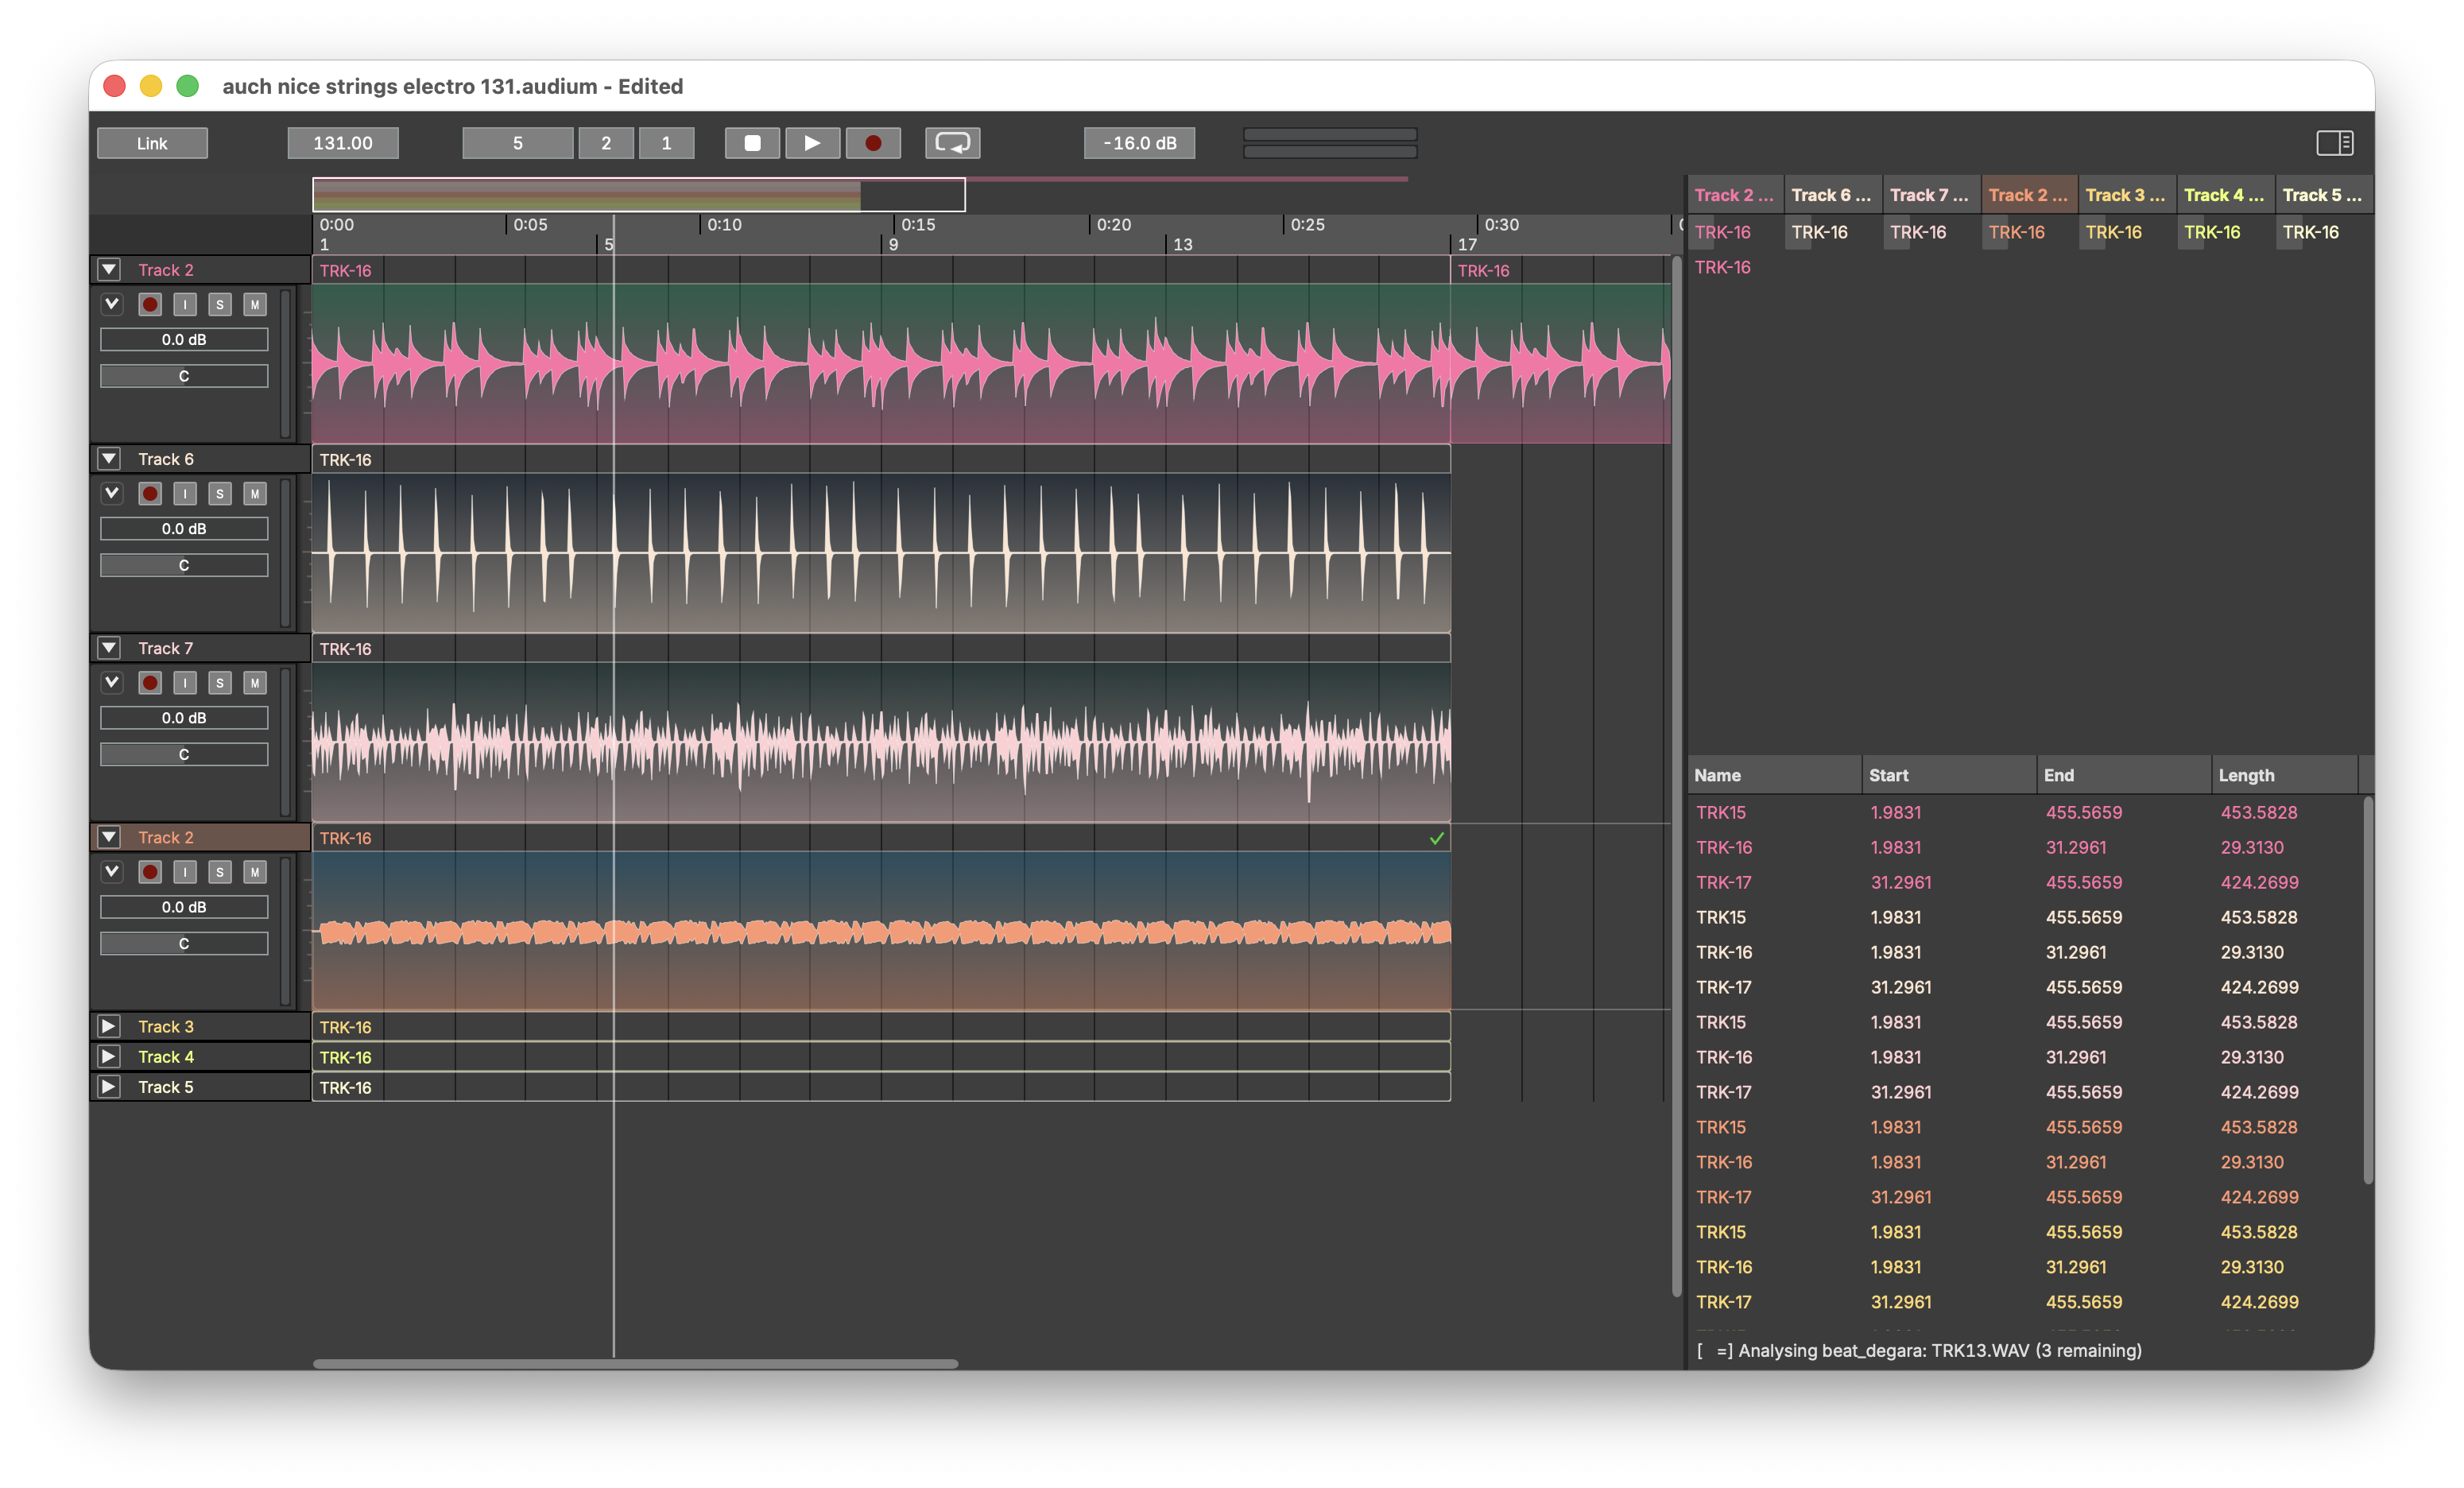
The window has three areas: the header bar across the top, the middle area with channel strips and the arrangement timeline, and the right panel with regions and playlists. A separate floating File Browser window is available from the View menu.
Header bar
The header carries everything global:
- Link — enables Ableton Link, syncing tempo and transport with other Link-enabled software on your network.
- Tempo — the project tempo in BPM. All bar/beat positions derive from it.
- Position — the transport position in bars, beats and ticks; editable.
- Play / Stop / Record / Loop — the transport. Space toggles play/stop. Record arms the transport for recording (see Recording).
- Master meter and volume — a stereo level meter and the master output gain.
- A button to show or hide the right panel.
Channel strips
Each track shows its channels as strips on the left of the arrangement. Per channel:
- M — mute, S — solo
- Record — arms the channel for recording
- Monitor — routes the channel's input to the output while armed
- a level meter, gain and pan controls
- a small menu button in the top-left corner with two submenus: Waveform Size and Routing (see Audio routing)
Channel height is adjustable (micro / small / medium / large / huge) to fit many channels on screen — set it per channel with Waveform Size in the strip menu, or for the whole track by right-clicking the track header and choosing a size from the Waveform Size submenu. The same track-header menu also holds the Show Analysis toggles (see Analysis and Auto Edit).
Right-clicking a channel offers Copy selected channel(s) to new track.
Audio routing
The strip menu's Routing submenu offers Input and Output, each listing the channels of the current audio device (as chosen in Settings → Audio) with the current choice ticked.
- Input picks the hardware input that feeds the channel when it is armed or monitoring. The default, Auto, uses the input with the same number as the channel's position in its track — the first channel of a track takes input 1, the second input 2, and so on.
- Output picks where the channel's signal goes. The default, Main Bus, sends it through the pan control into the stereo main mix, which passes through the master volume and shows on the master meter. Choosing a device output instead sends the channel — after its own gain, unpanned — directly to that output, bypassing the main mix, master volume and master meter. Use this to feed an external mixer or a separate headphone or monitor output.
A channel routed away from the defaults says so under its pan slider (In 3, Out 4); the note turns red when the current device cannot provide the route. With a direct output the pan slider is disabled — the signal bypasses the pan and the main bus entirely.
Routing changes are undoable and saved with the project. If you later open the project with a device that lacks the chosen channel, the menu lists the saved choice as not available and the channel stays silent (or cannot be armed) until you pick an available channel or switch back to the original device — the saved routing is kept.
Arrangement
The timeline. Tracks run horizontally; clips are drawn with their waveforms and can be dragged, trimmed and split. A bar/beat grid underlies everything (snapping can be toggled), and analysis results — segment boundaries, beats — can be displayed over the material.
Navigation: Cmd++ / Cmd+- zoom, ← / → page left and right, View → Follow Transport (Ctrl+F) keeps the view on the playhead.
Right panel
Two stacked lists, divided by a draggable resizer:
- Regions — every named region in the project. This is the pool of material you can place on the timeline.
- Playlists — the sequence of clips per track.
File Browser
View → Open File Browser opens a floating file tree (starting in your Music folder). Select one or more audio files and drag them into the arrangement to import them.